
ZAM is the leading article management solution for Zalando, it integrates and synchronizes articles from Shopify to your connected Zalando store.
The ZAM’s zDirect feature provides partners with tools and data to integrate, improve and upscale their businesses.
ZAM is designed to give their partners/vendors the best Shopify synchronization experience while offering a seamless integration service on both platforms.
Why use ZAM?
ZAM is undoubtedly the best means for vendors or partners to synchronize their online store from Shopify to Zalando. It has numerous features that help to make the process easier and faster. To experience a hassle-free integration of both platforms, listed below are a few excellent features available on ZAM.
How to Set-up ZAM
As stated earlier, ZAM is a very simple and straight-forward software. It is designed in such a way that you do not need an expert to set it up for you, all you have to do is to follow the set up guide and in five to ten minutes, you are done setting up ZAM.
Kindly follow the step-by-step guide below.
You are expected to have a Shopify store.
Steps
Step 1: Sign into your Shopify Store
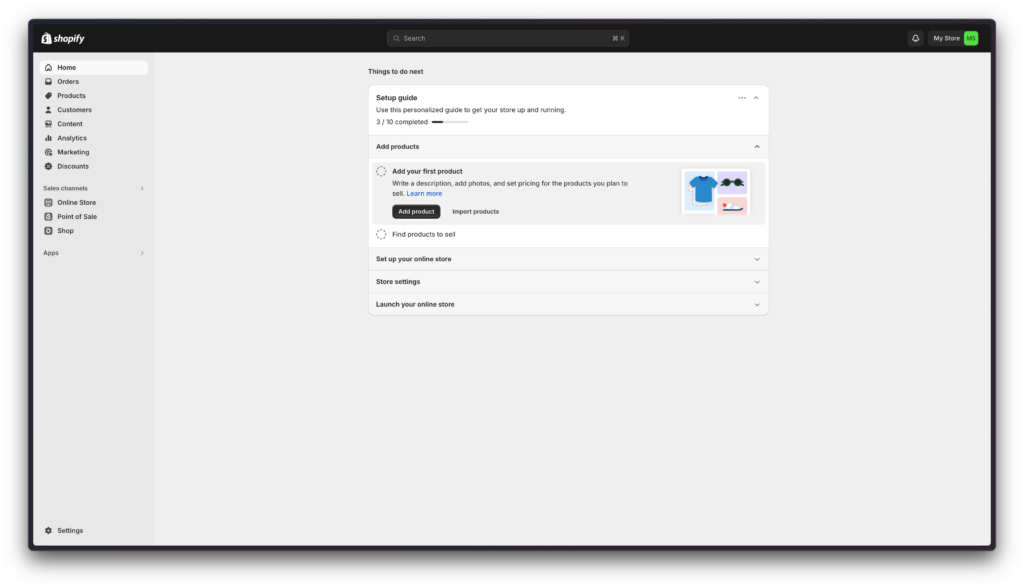
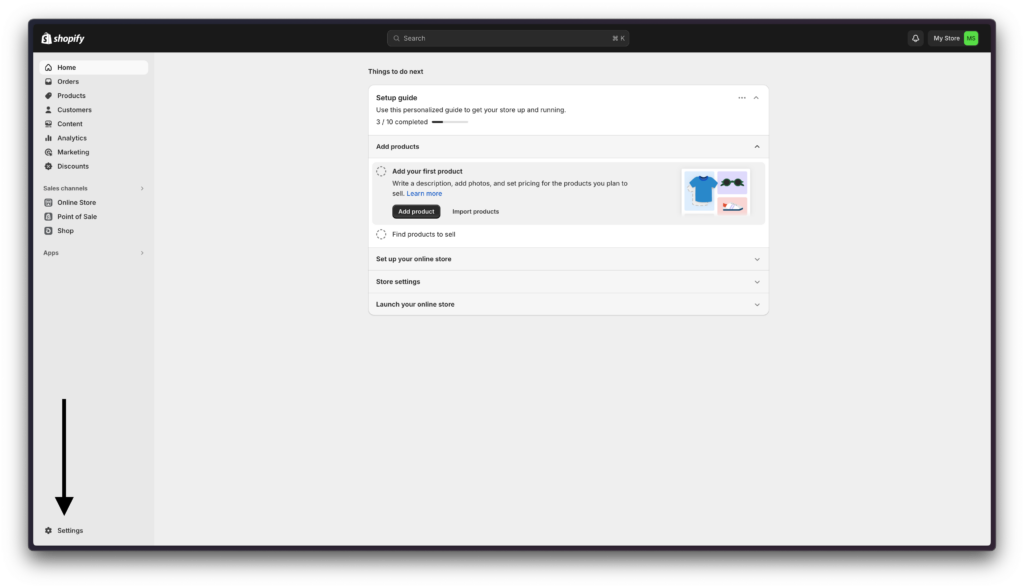
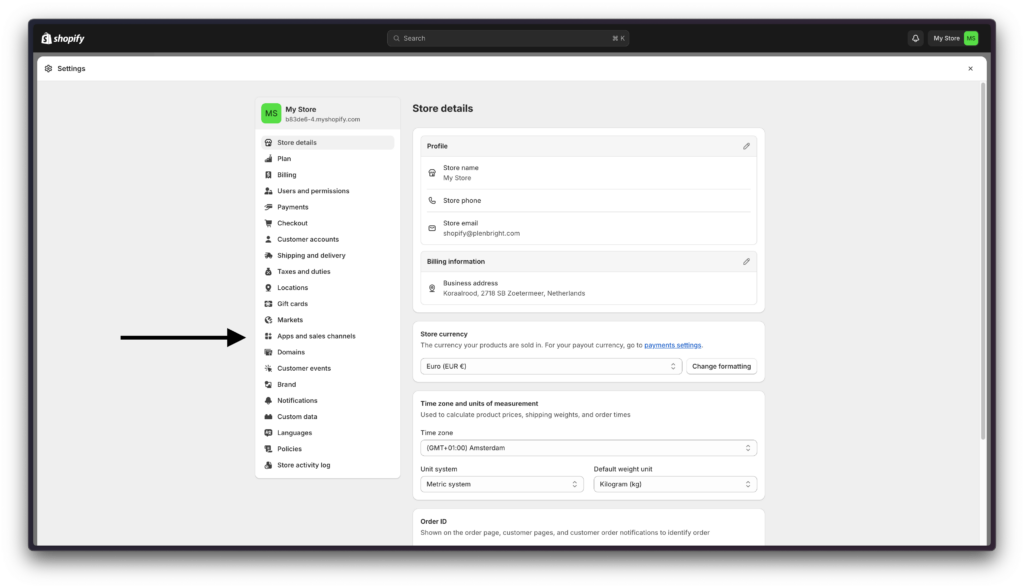
Step 2: Click on Settings
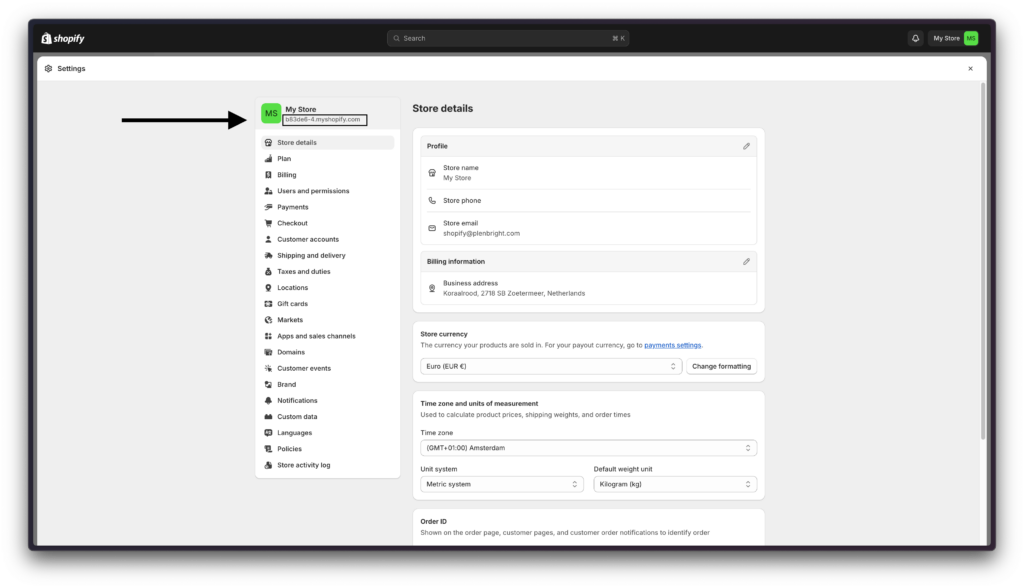
Step 3: Copy your Shop Domain
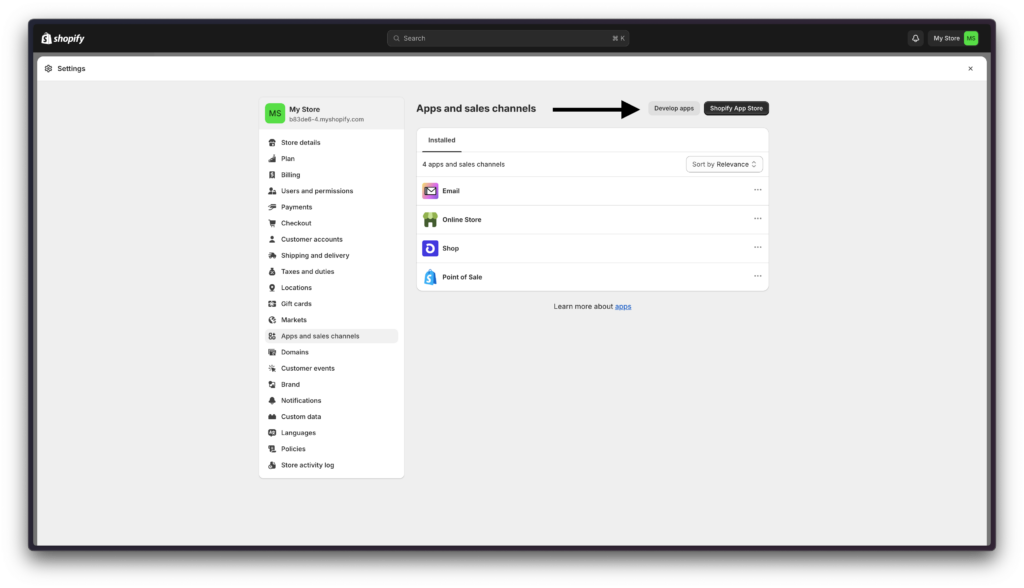
Step 4: Click on Apps and Sales Channels
Step 5: Click on Develop Apps
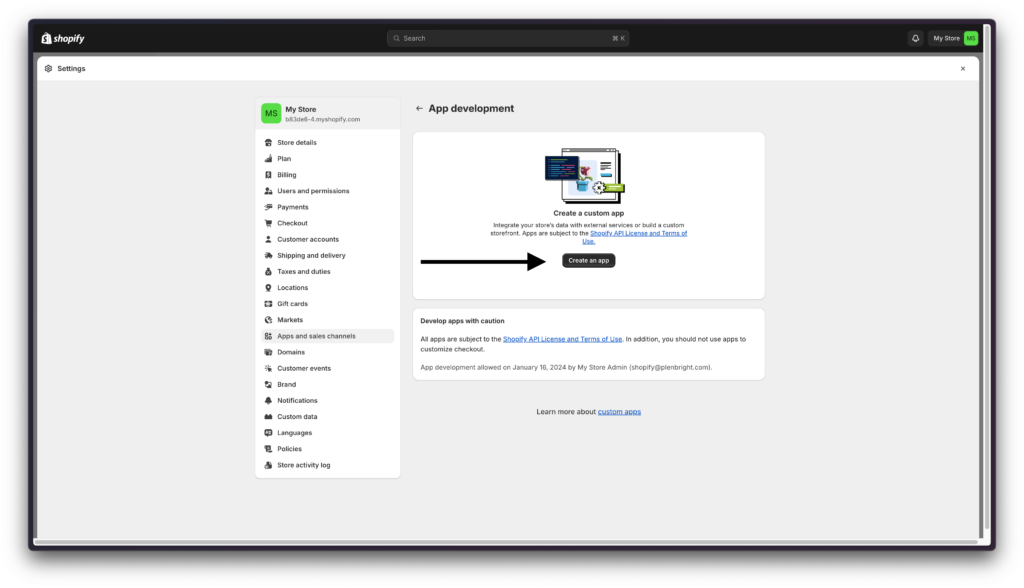
Step 6: Click on Create an App
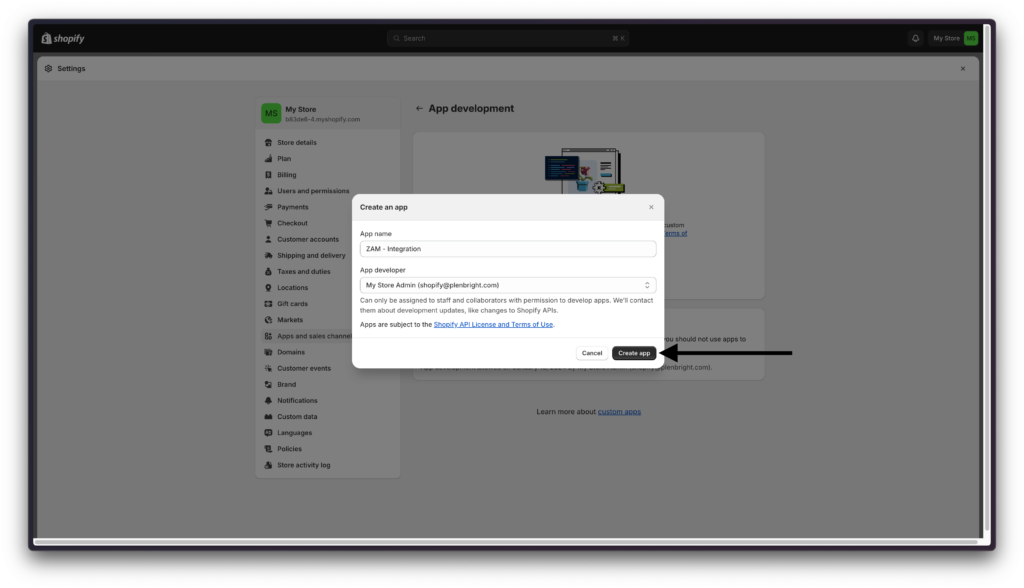
Step 7: Enter an application name ( ZAM – Integration )
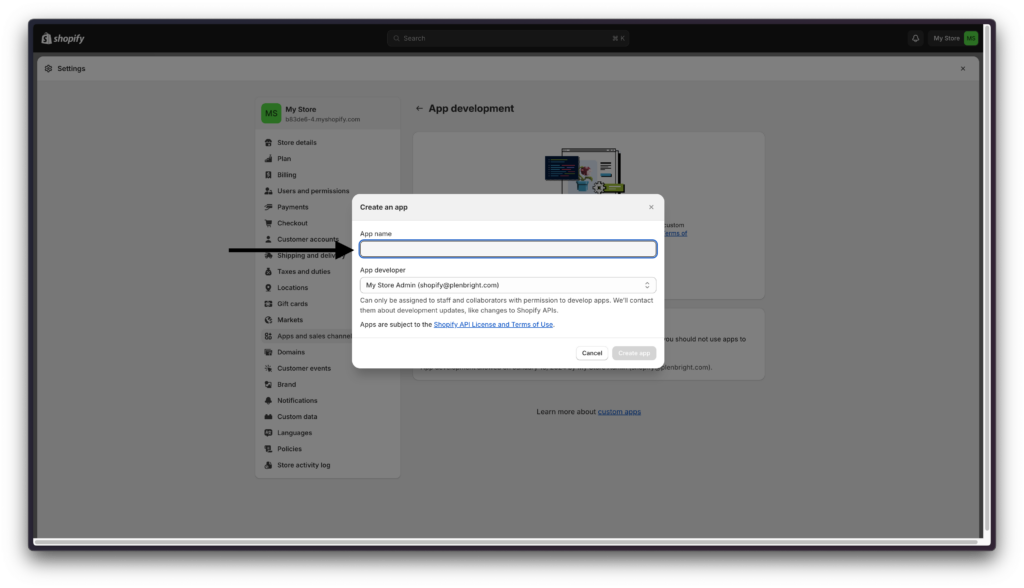
Step 8: Click on Create App
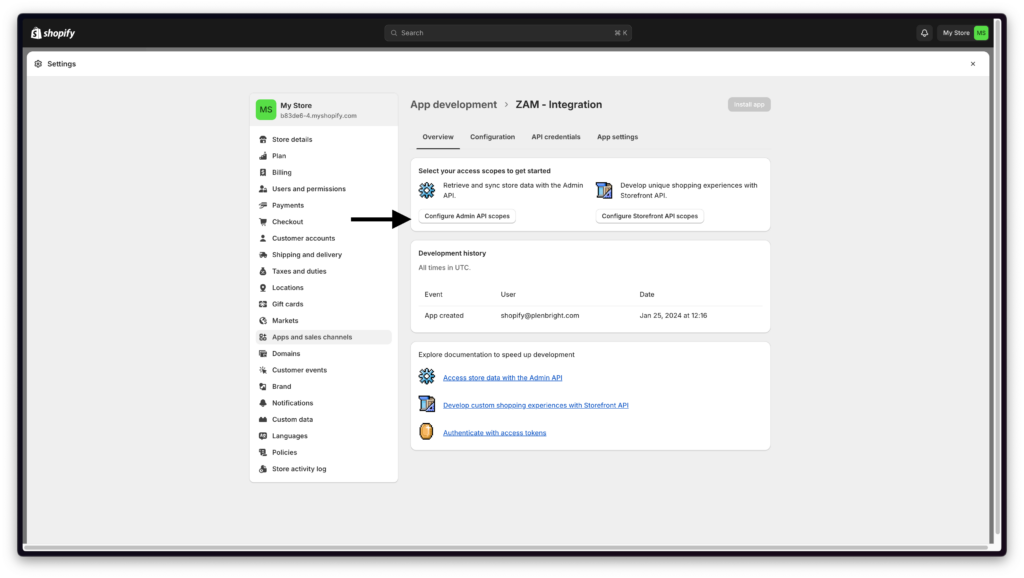
Step 9: Click on Configure Admin API Scopes
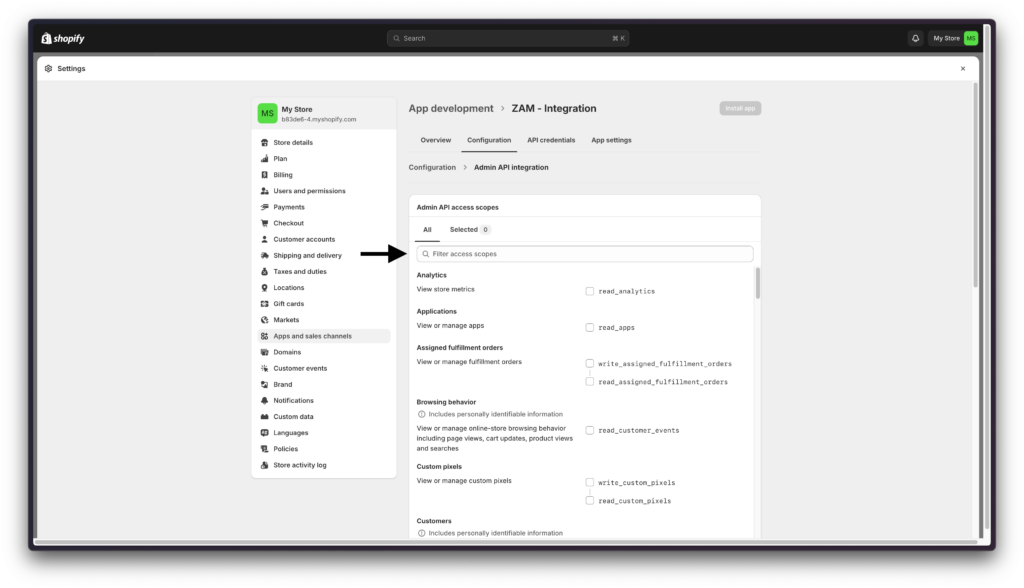
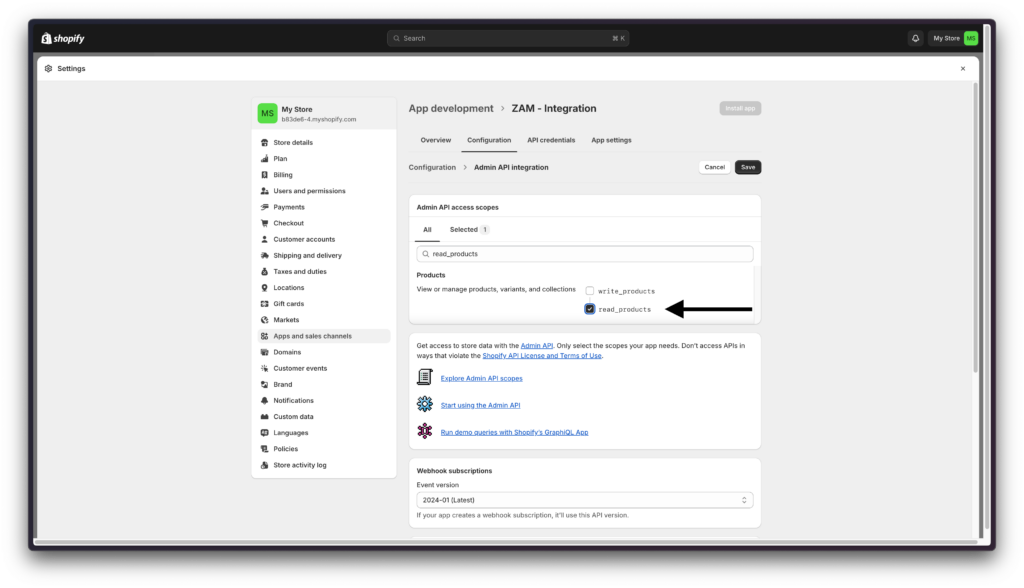
Step 10: Search for the “read_products” scope
Step 11: Select the “read_products” scope and ensure its ticked.
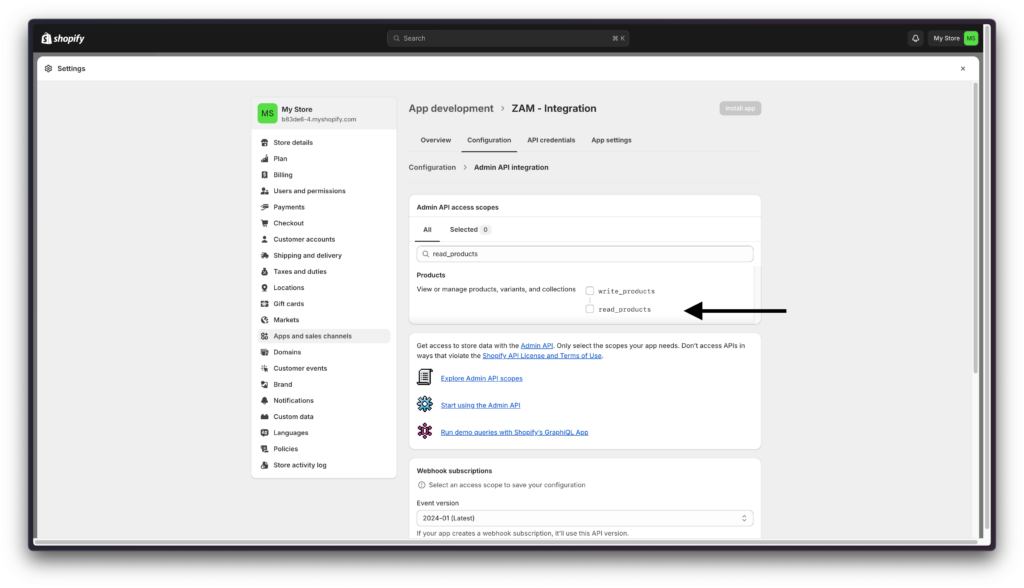
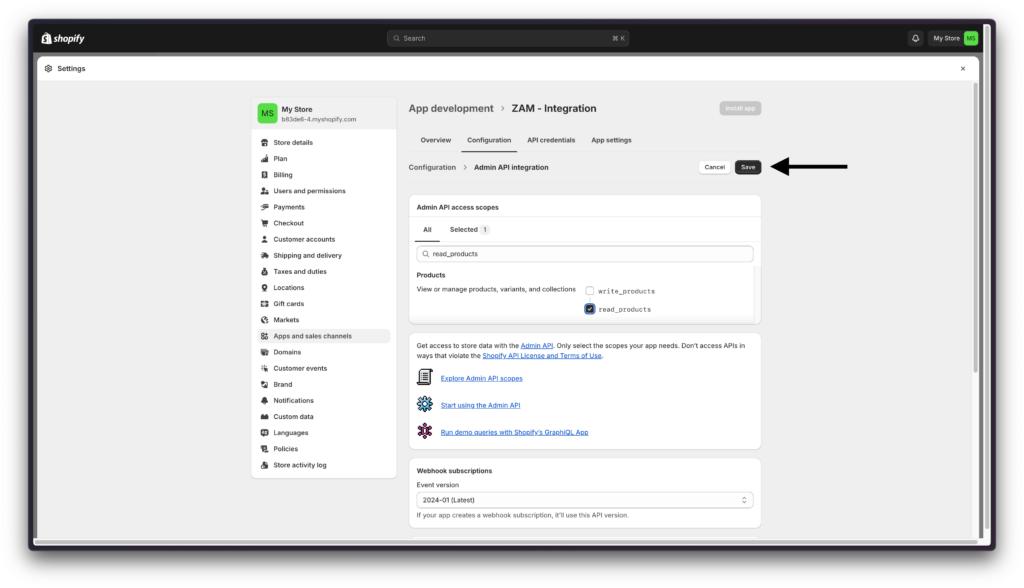
Step 12: Click on Save
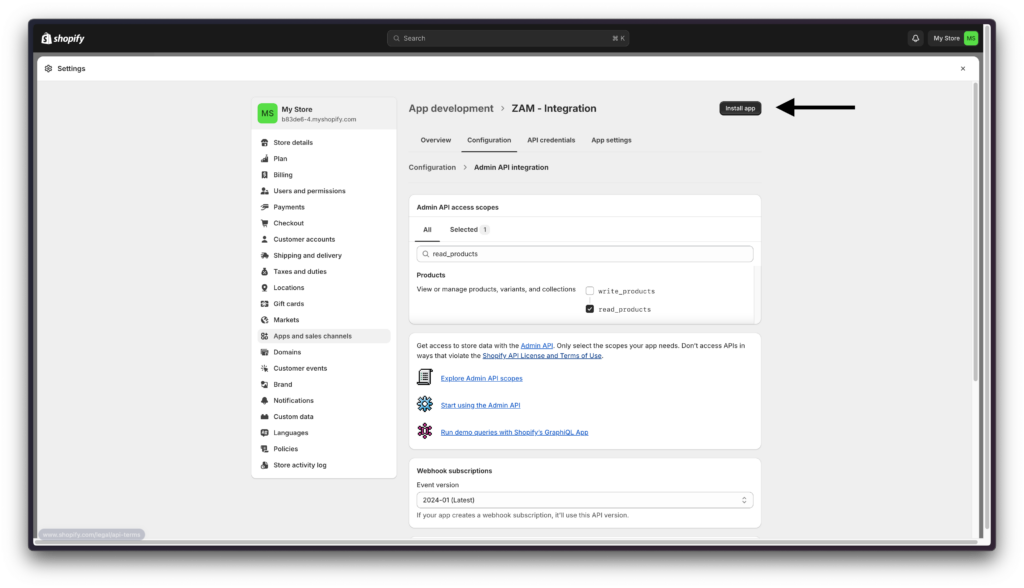
Step 13: Click on Install app
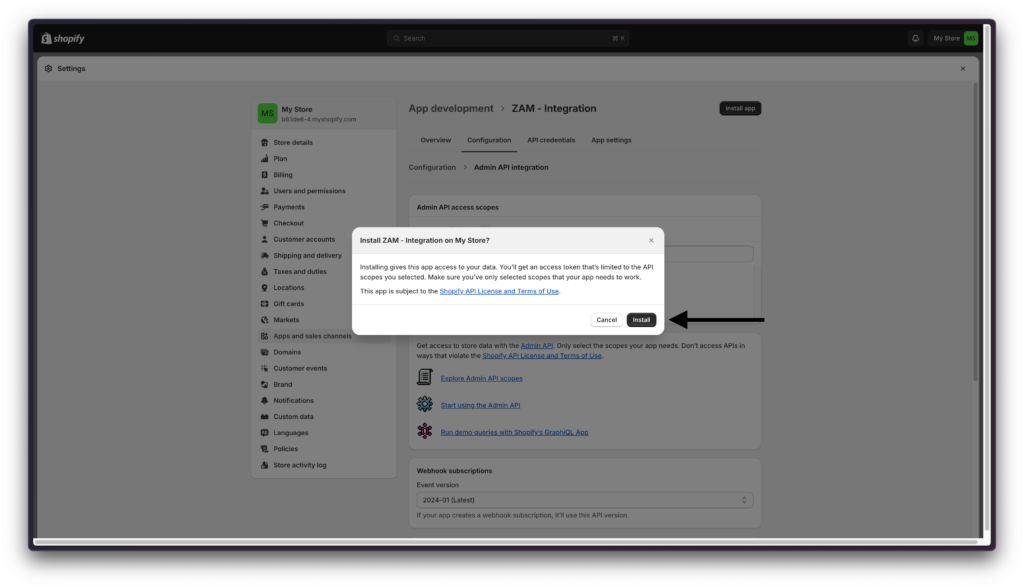
Step 14: Confirm Installation
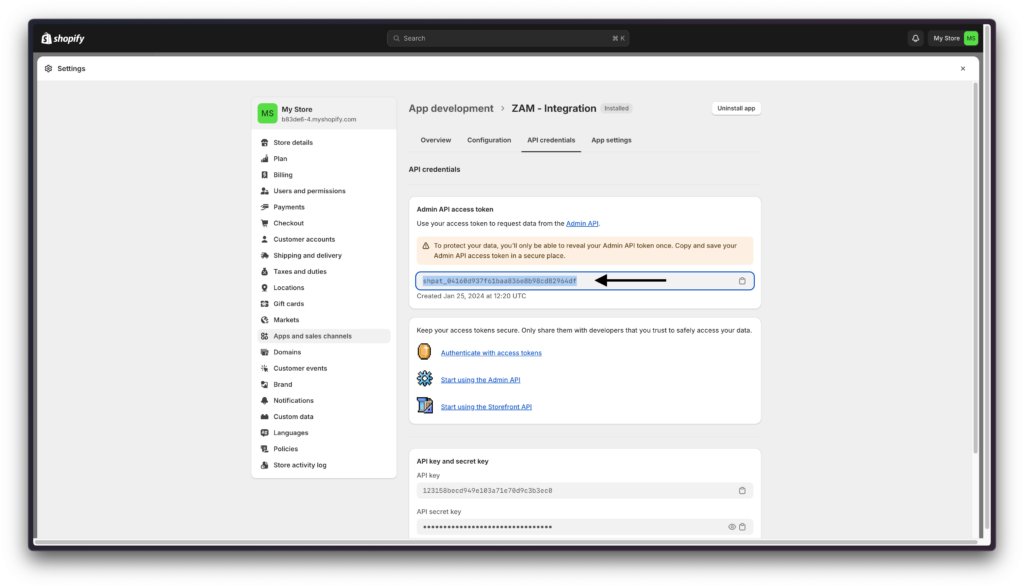
Step 15: Click on Reveal Token Once
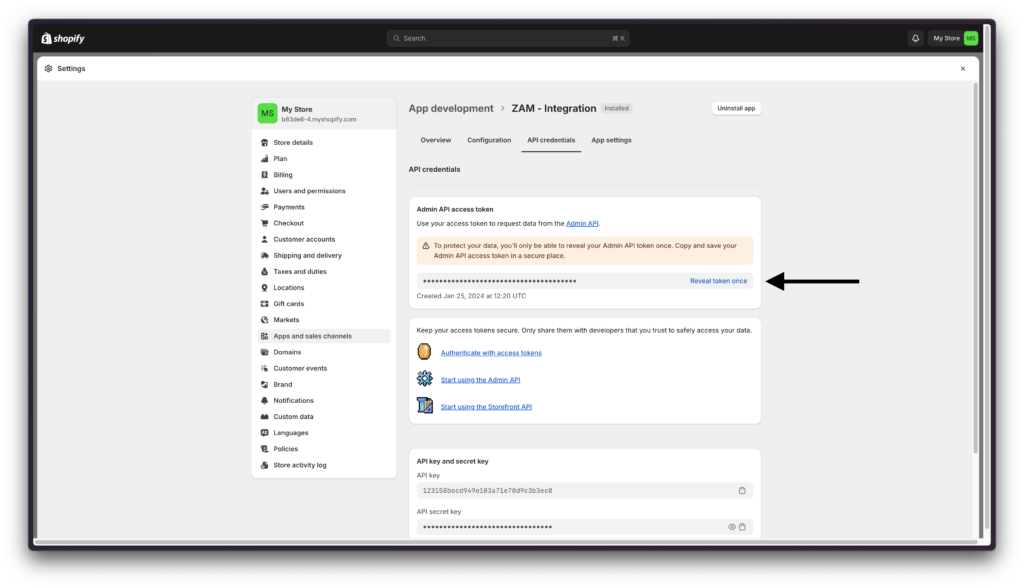
Step 16: Copy the revealed token to a safe place. You’ll be using this token to authorize your store in subsequent steps.
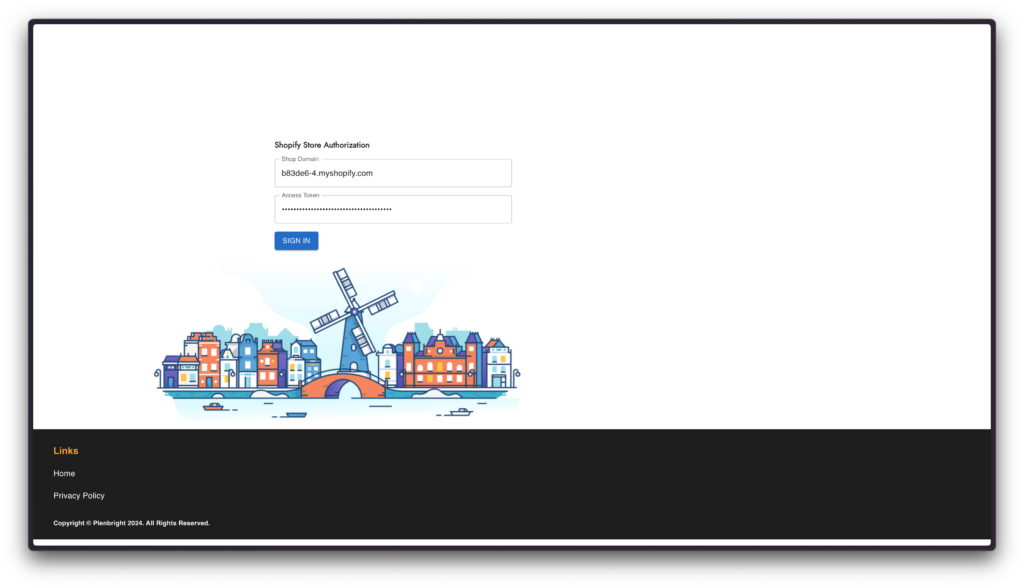
Step 17: Go to https://cr-client.plenbright.io/setup-store

Step 18: Enter your Shop Domain from Step 3

Step 19: Enter your Access Token from Step 14
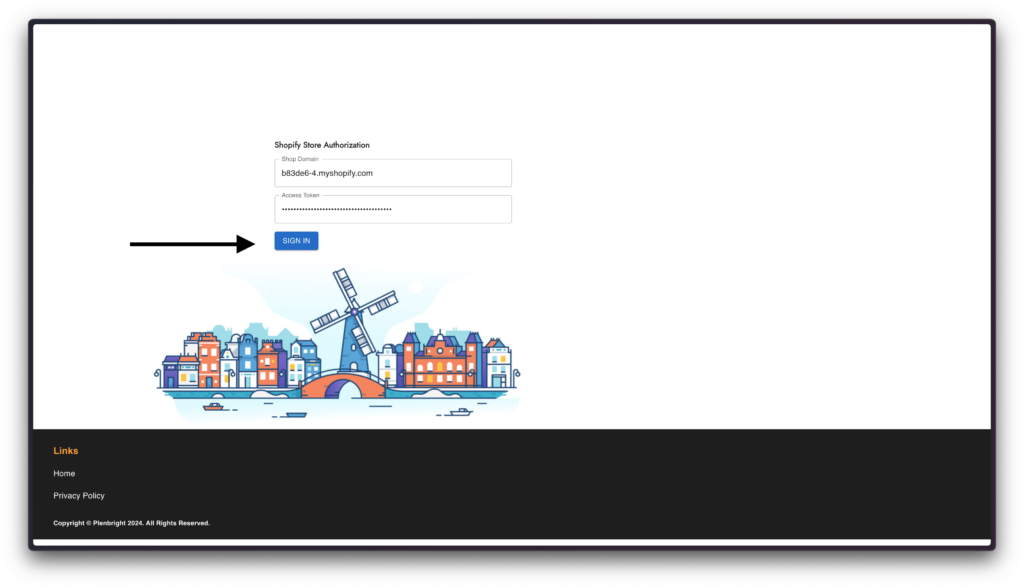
Step 20: Click on Sign In
Don’t forget to keep your Shop Domain, Access Token, and the Authorization URL (https://cr-client.plenbright.io/setup-store) handy! Once you’ve set everything up the first time, you won’t have to go through all those steps again to access ZAM. Whenever you need to, just head over to the Authorization URL, pop in your credentials, and you’re all set to go!